Monday, 1 December 2014

New Arrivals, Three Ex Battery Hens

Last weekend we collected three new hens for are now growing flock. I think I can call it a flock, I have seven in all! We got them from our local Animal rescue in Brinsley which had the week before rescued several hundred birds in an effort to give them new loving homes.

My four original birds came to me as pullets and were in fantastic condition and have blossomed into plump, fluffy, egg laying masters, so to see my new arrivals in the miserable condition brought upon them from being battery farmed hens was a real eye opener. Of course like many of us we know what happens to these hens but  to see the difference in reality real rocks your world. Half bold, rather small and skinny, combs pale and floppy all signs that they were in a rotten condition.

It has I have to say been an experience introducing new birds to an existing group. Especially when the group is bigger, fatter and fitter than the new birds.
First steps in the garden

At the first day I ran both groups together either side of a fence, in the hope that would lessen then stress when I finally introduced them properly. The Ex bats where at a loss as what to do, Grass? What is that? They seem to be thinking, wandering around looking rather confused. They neither pecked or scratched at it, which is the first thing my old hens would do. Infact give them half an hour and the grass would be in a terrible state. We kept them separate for a couple of days then brought them together.

Nothing really prepares you for the viciousness of the pecking order!! The old girls took it upon themselves in military fashion to impose their rule immediately. It is nasty but one which needs to happen, all you can do it try to lessen the ordeal. One tip I used was to Vaseline the combs of the new girls, which is supposed to help protect from injury when being attacked. So far no injuries has happened. I have also fed them separate from the others making sure they get as much food as possible. As one of the major areas of conflict when introducing hens is the established group is food, they do not want to share!  

She was rather scared of me, as her face suggests!
Its been a week now and it has calmed down no end in the run. It took about 4/5nights for the new girls to understand that they needed to go to bed in the coop. So i had to but them in bed each night in the dark until they got used to this. They are also laying and I am getting still, 5/6 eggs a day. Which I take as a compliment that they are happy!!!

Friday, 3 October 2014

Finally back online!

So its been who knows how many moths offline....My laptop decided it could no longer continue, when its motherboard gave in on it! Its was an Acer that I only bought two years ago, which makes it even more gutting that it broke so soon. So as you can guess I will not be getting an Acer again.

It seems they have a media card issue, which frequently breaks add to this that the said media card is hard wired into the motherboard means when it goes the whole board needs replacing. The cost of which in a shop to fix is more or less the same as a new laptop. I bought a new one!

Its lovely!

I will try and fix the Acer though, just to see if I can.

With this problem I have pretty much missed the growing season and recording it on here. In brief it has been an up and down kind of year with somethings doing great and others not. Tomatoes, cucumbers and melons have been prolific, but potatoes after growing the most I have ever grown got blight and over half have gone in the bin. No doubt more will follow.

Wednesday, 30 July 2014

Broken Laptop

So my laptop is broken which explains the lack of posting over the last month or so! I'm due to go on holiday but when I get back I hope to get it fixed as lots has happen in the garden! I need to get on G+ to as I miss the great posts on there, I just can't do anything without my laptop! 

Friday, 6 June 2014

First Harvest of the Year...... Garlic

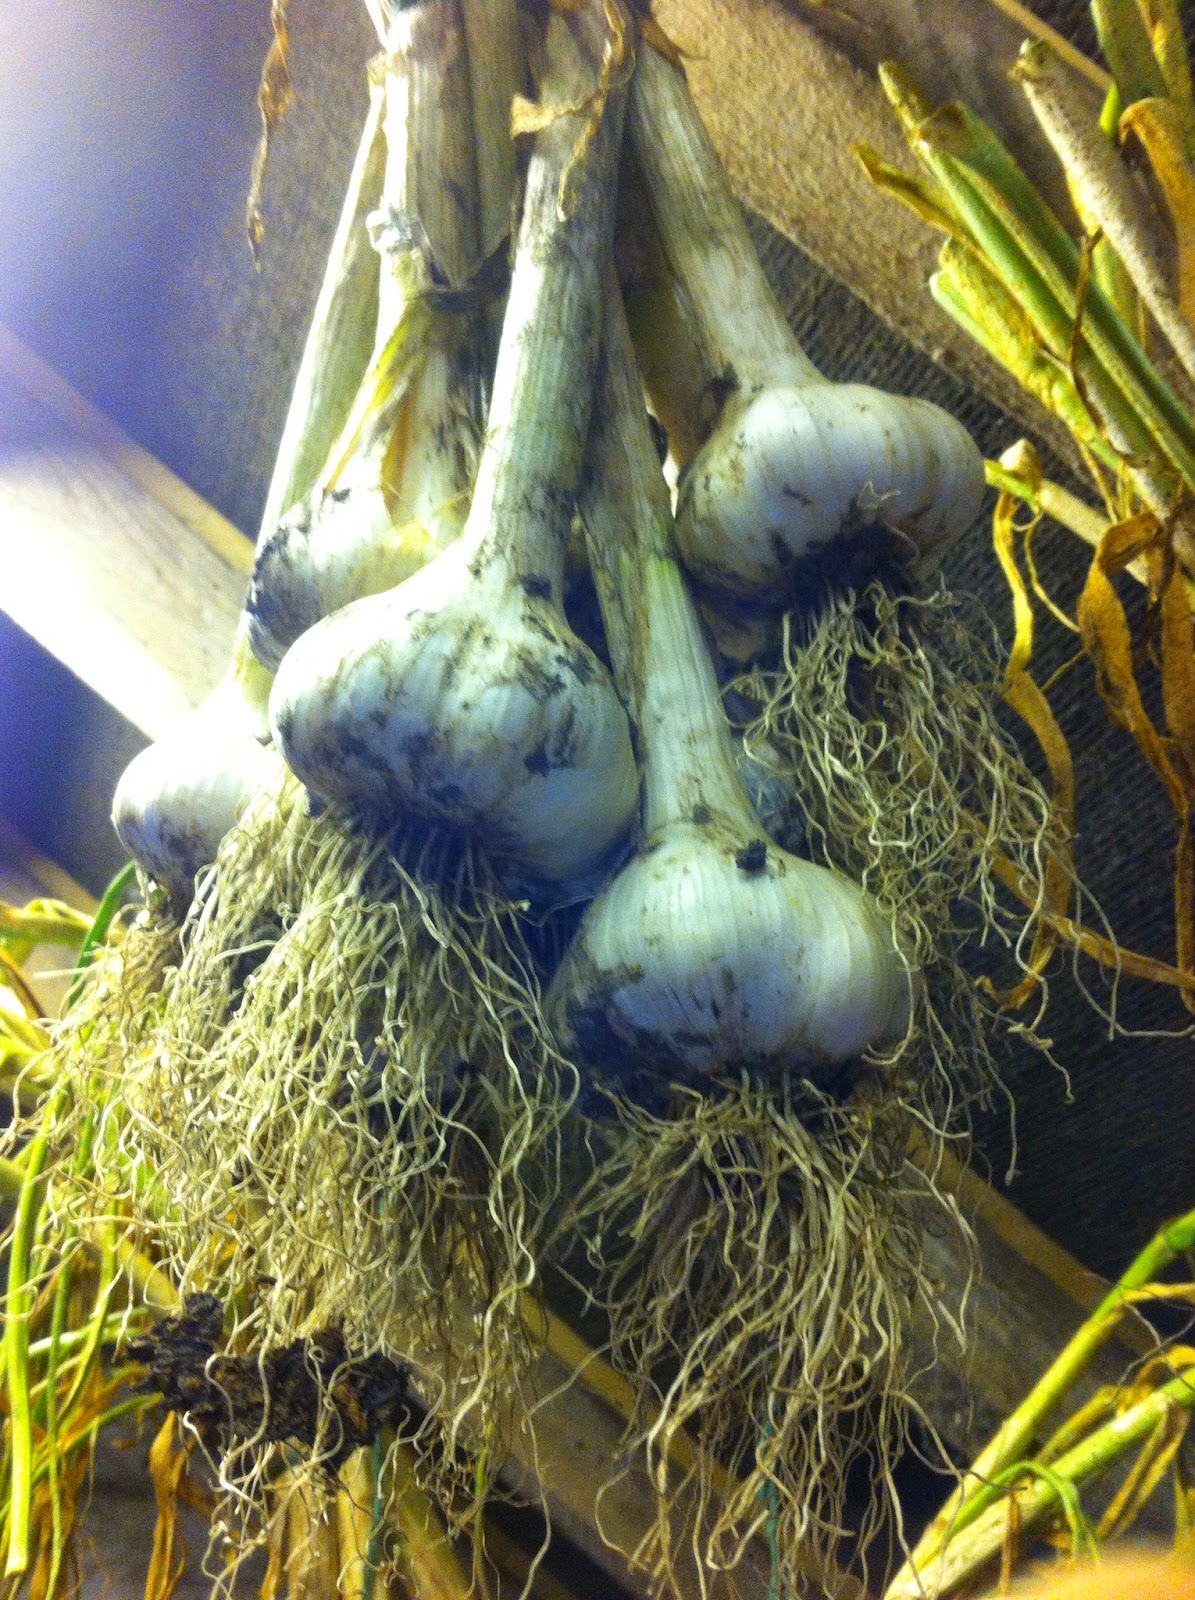
I have harvested all my Garlic already, its only June. The plan was not to pull it up this early but things happen that change your plans. I over wintered the garlic with my onions and they were doing brilliantly however over the last month or so they got rust on the leaves and were looking terrible. Only the garlic was suffering, the onions are thriving and have no sign of rust yet! The rust was killing the leaves and I noticed that the plants were trying to send out new shoots and at first I thought great they will keep on going. When I looked closer though the cloves in the bulb were growing individually and thus as new plants all together. So if I was going to use them at all I needed to get them up.


I was actually rather surprised at the size of them, most are bigger than any garlic I have grown before with well formed plump cloves. All in all 40 bulbs of garlic are now drying in the shed.

Unplanned as it might have been to lift them now and have an unexpected empty part of my veg bed it does give me the opportunity to get something else in. Its still early enough to get another batch of sweetcorn going so that is what I am going to do. I had an unused pack of Eskimo White Corn sitting in the seed tin. I just got to run some manure and fertiliser through and hopefully double my money. 

Lupin Update

So a few days ago I posted about one of my lupins looking like it was about to pop its cloggs (die). The leaves gad all wilted and the flowers were turning brown and limp to one side. From that post David Innes replied and gave me a check list to see if I could work out what the problem could be.... So I did. I looked over the plant to see if I could find anything abnormal above soil level other that the obvious wilting there was nothing.

I then cut one of the stems to see if I could see any discolouring or rot, nothing again. So finally I I dug it up and looked at the roots.


I didn't even need to wash the dirt from the roots to see the problem, large parts of it had turned to a squiggy mush and turned a rotten brown. And where the root met the stem it was semi rotted turning blacky brown and hollow. THATS WHY IT WILTED! The Stems were not getting water nutrition because of this rot.


What caused this, I do not know but all my other lupins will be being watched carefully. It could be disease or it could be the soil conditions i suppose that instigated the down fall of my poor Lupin.

Tuesday, 3 June 2014

Lupins and Fusarium Root Rot? Or something else completely!?

Its still early in the summer and I have few plants in flower, my Lupins being an exception. They are in full bloom and looking amazing as they always do. However over the last couple of weeks one of the plants has started to look really ill. Nearly all the leaves have become yellow and wilted.


As you can see from the picture it is looking in a right state, the flowers are now even starting to go the same way. As soon as I noticed I looked at the RHS website to see if I could find a cause, but powdery mildew and leaf spot the only too listed diseases didn't fit the bill. I may be wrong and being a hypochondriac about my plants the symptoms seem to point to root rot or Fusarium wilting. Two terms when applied to Lupins means absolutely nothing to me.  The literature I have found online has been rather wordy and does not state if there is anything I can do... just the symptoms and the causes. This blog article was the most indepth info i could find and probably inseminated my mind that my lupin has Fasarium Root Rot.

In any case this Lupin looks like it is on its last legs and I will probably dig it out in the next day or two. My other lupins are so fare unaffected and Iwant to keep it that way whatever the reason it is wilting on me.


Wednesday, 28 May 2014

Home made Sun Jar Mark 1

I had a bit of an epiphany the other day, I was in Ikea buying  buying some Jam Jars for this years harvest and some bottles for a bit of homebrew. They are buy far the cheapest around and of decent quality. The below Jar was 80 pence. When I got home it occurred to me that they would make great Sun Jars. The cost of which are quite expensive a quick google finds many at from £10 upwards. This cost me less of course... the most expensive part being the glass frosting spray. 


Friday, 23 May 2014

Garden Vlog Growth, Flowers and FRUIT!!!!!


Okay so I finally made another video, think I am a little shy! Anyway just a quick look round the greenhouse as things are really progressing in there!


Saturday, 17 May 2014

Solar Lights Better than I Imagined

In an effort to remember that the garden is just not my domain but also my girlfriends I bought some solar lights. Which had been something she had talked about having, I have to say I was not that keen for whatever reason. So I parted with £15 and bought 20 meter length of LED's, simple warm coloured and not shaped like butterflies. The problem with the internet it can show you some very seductive and amazing design pictures and its not always something you can replicate. However on this occasion I am happy with what I have done. The pictures of course can't do it justice, the limitations of smartphone photography at dusk/night are all to plain!   


Monday, 21 April 2014

Indigenous Micro-organisms/IMO

I spend a hell of a lot of time googling things to do with my garden, I have have lost many hours at home and work looking at stuff, projects, plants, DIY....... ETC. I am always looking for new idea's and ways of doing things and improving what I do now. I certainly enjoy the process of looking and trying things out. It was through one of my googling sessions I came across Indigenous Micro-organisms or IMO's for short, these are present within our soil and are a good gage on its fertility. I have been over the last two years using the Bokashi composting system which employs IMO's to breakdown waste anaerobically. This process which I have wrote about previously (Bokashi Composting) creates both a quick way to make compost as well as a liquid feed rich in nutrients as well as IMO's. Its very much a winner for me, However the one and only downside to it is the cost of the Bokashi Bran itself, which isn't cheap in my opinion. But as it turns out the Koreans have been farming with IMO's for centuries and you don't need a laboratory to create it. All you need to begin with is some rice and some sugar!! If your at all interested in making your own bokashi its well worth watching Bryan McGrath's Vlog linked below.


I found that taking notes from these videos helps as they are quiet long and indepth, yet the actual process on paper seems simple. I have already begun the process of collecting my own IMO's with my bowl of rice, fingers crossed that in a few days when I look it will be full of nice white mold.

The aim eventually is to make my own Bokashi, using the IMO's i have collected and grown and then inoculating wood shavings that I already buy in for the chicken coop. I may even see if I can use shavings that I have taken out of the coop and separate out most of the manure. Its all a bit of an experiment but after reading a few studies on the effectiveness of IMO's on soil quality I think its certainly worth trying.

Saturday, 19 April 2014

Finally built the needed garden gate!

I finally got round to building a gate and thus stop my girls escaping into my flower garden and into next doors garden. I have had no end of escapes and running around after excitable hens. But no more!

Instead of the above ramshackle, temporary thing I had made a gate out of an old pallet as well as two planters to sit on the wall either side of it. In the planters I have put in some rosemary and the Idea is to have a little hedge further fortifying the Chicken area!

Garden Update 2014

So I posted they pics earlier on G+ but with out explanation. I am rather please with how well every thing seems to be going and since I took the photo many of the plants have grown considerably.

 I have to admit I have that I have a problem, I can not stop buying plants..... I don't go around buying everything I see but if I do see something exotic or unusual I really can not help myself. Hence in the picture to my right 4 Chilean Guava plants and 2 Goji Berry plants. I have never eaten a Guava berry in my life but I could not help myself, however they were an absolute bargain, I got 6 potted plants for £10 on the Dobies website, follow the link here if you want some. I actually thought I was buying 3 plants so gave 2 to my neighbour. The Goji berry came from Morrison's supermarket at the very reasonable price of £2 a plant. I also came home with 2 Gooseberry bushes. All are intended to be grown in pots for now.


To the left I have some Nasturtium Empress of India in my tin can hanger, they are very easy to grow add a bit of colour with the added bonus of having edible flowers. They do attract the cabbage white butterfly though so you have to be quick to get some before the caterpillars have their fill.


I have gone tomato mad this year, it being my first year with a proper greenhouse. I love tomatoes but I think everyone I know will be sick of them come the end of the season. I have about 5 varieties on the go the one in the picture is called Latah and promises to yield fruit in late June and early July. Fingers crossed it does. I bought the seed for this from Realseeds.co.uk


Because of the greenhouse I have also got Melon Madness..... I think I have 4 or 5 Melon varieties, to the left we have Minnesota Midget again from realseeds.co.uk. The small seedlings are Cucamelons not true melons but more like little cucumbers that look like watermelons. I got the seed for these from Russia. But i have seen therm everywhere after I bought them.


After a very successful harvest last year of sweetcorn, I have I have trebles the amount at least of plants for this year. Sticking with the same variety called Double Standard. The Sweetcorn is planned to be part of a Three Sisters planting scheme with peas, French beans and and courgette. I have added a few other plants too such as sunflowers broadbeans and I think I might try a melon or cucumber in there as well.


An there is one of the courgettes, this one will be from in the pot, its actually been hit by the frost a bit but I think it will survive.


Last year I wanted to grow enough spuds to last me all year, and I did. This year I have growing even more and more varieties too. My main crop here in the pic is Mayan Gold.I have had my potatoes in this barrel for since the start of March which was a little risky but the weather has been kind. The are soiled up to about two thirds of the barrel. The crop in the beds is just getting going now.


Ahh the Rhubarb seems to have taken well after being moved for the second year in a row. I wont be moving them for the foreseeable future/ Still I will only take a little from it this year just to make sure they get established.


Finally the Garlic, the picture really can do them justice, they are so well established from over wintering. I will always over winter from now on. The varieties are Elephant Garlic and White Solent. I have mulched them and the onions for the first time too.


Sunday, 6 April 2014

Trio Tin Can Planter Project

I have been a busy boy! Making things, from trash and this is another project I recently finished. A trio of vertical tin can planters. The idea came to me after seeing a similar projects on Pinterest made with terracotta pots that sat in wooden rests and suspended vertically.I thought they were great and wanted to make my own. However I neither had the required pots or tools to make them. So like a good upcycler I thought about what materials I could get a hold off. 


To make this you will need.......

Three large tin cans (I sourced these from my work, they are around 3 litres in size)
Three hanging basket chains (I bought these for about 75p from a local garden shop)
Two M8 marine bolts with nuts and washers (the most expensive part of this if you find a cheaper part that's great)
A drill and metal drill bits
Electrical wire snips
And Paint!!

To Build.....

Clean your tins inside and out in hot soapy water
Lightly sand the surface you are going to paint and wipe with a damp cloth
Drill your holes,you will need to drill one hole slightly bigger than the M8 bolt in the centre base of two cans, three small hole around the rim of the can for the chain clips, I did this by eye it doesn't need to be perfect. and finally drainage holes.
Attach your M8 marine bolts a washers on either side and tighten up.
Paint your cans, I used spray paint that I had in the shed hence the random nature of the colours.
Attach your hanging basket chains, I shortened mine to 12 links as they were far to long, to do this just count the amount of links you would like for the desired length, move the clip to that link and if it looks right snip of the excess with the wire snips.
Finally plant up!! My trio is going to be in an almost full shade part of my yard thus ferns will be going in when I get some.

Saturday, 5 April 2014

Small Vertical Garden Update


Last year I posted about some of the recycling projects I had been doing (A poor gardeners addiction) and one of the things that I had made was a vertical wall garden. I finally got round to planting it up last week and though it looks a little rough around the edges at the moment I am sure it will soon fill out and look alot better.

I chose a few different plants that I hope will cover up the structure! There are two ferns, two grasses and a Periwinkle that have taken up residence so far and I have also got some Viola to finish it off. The idea being that these are all pretty effortless plants growing in varying conditions and of course evergreen so one its established its a wall of greenery all year round!

This isn't a big pallet, any bigger I would have really struggled to move it with all the compost in it. Its going to stay there until it falls to bits!

Tuesday, 18 March 2014

Elephant Garlic and White Solent

For this year I decided to overwinter my Garlic, I chose two varieties specifically with this in mind. White Solent was my first choice a good sized bulb and excellent flavour. My second choice was Elephant garlic, not a true garlic but a a very close blood relative. The bulbs a huge and the flavour milder! I planted them out around October or November and they look in excellent health! 

Monday, 17 March 2014

Garden Projects Picture Frame Planter and Tin Can Plant Pot

We have had some brilliant weather through March, the summer feeling has definitely come a little early this year. everyone one has been out in the gardens making the most of the dry sunny weather and even a BBQ or too. We had a high of 18 Celsius..... to some that might seem pretty cold but to us Brits at this time of year that's down right tropical! Especially after the winter we have had! So everyone has been getting ready for the summer ahead, myself included. But there is only so much you can do this time of year and for me this is when I start playing around and try to make things. And yesterday I made two picture frame planters, as an experiment really but I was quiet happy with the way they turned out.

I was pottering around the garden and cleaning up when I went to drop some rubbish in the bin and low and behold my partner had been cleaning out the house and these two small picture frames were on the top. I have seen a few posts on Pinterest and other sites where people had made these and I always thought they looked great. They were always on a bigger scale compared to my modest attempt however I think they could create a good effect, my neighbour was amazed though I don't know how much of that was politeness!

To make these I used some pallet wood to make the sides and some old plastic fascia board that was sitting idle in the shed. Finally some chicken wire that was left over. I knocked up a U-shape for the bottom and sides with the wood and nailed the fascia board on to the back. The chicken wire I used to sit in between the frame and the base to help hold plants in. FinallyI just nailed the frame on to the box base. This actually only took 10 minutes to make.
So far I have filled one with compost and seeded it with plain old grass. Really I just want to see what it will look like and weather it will work..... The other I would like to try some sort of flower, alpine type maybe.

I also made a planter out of an old tin can, I loved the paper label that was on it, the blue and orange so I really wanted to keep it. To do this I used a clear Lacquer spray, normally used for car metal work. And sprayed it A LOT! It seems water tight, and hopefully I get to keep the label on it!


Well time to go and plant up my early potatoes, the sun seems to be coming back out.

Friday, 21 February 2014

Garden Vlog February 2014

I finally worked up the courage to do my own Garden Vlog, after many years of enjoying other peoples. I have always found them interesting, especially those that are full of tips and how to do something. Unfortunately my one is not like this but really just a quick look around my small veg plot. It will give you an idea of what my set up is and what I have planned. Please do excuse my verbalised pauses........Errrrrrrrrr! I was a nervous first timer and hope that any future ones I do will be much better!! Oh and finally it has rather an abrupt ending as my neighbour came up the garden and It was abit weird filming this with him stood there!


Thursday, 30 January 2014

Potato Choices 2014

Last year I grew only 2 varieties of Potato, King Edward and Rocket. I was especially happy with the taste and abundance of Rocket, made the best new potatoes I have ever had. The King Edwards however grew plentifully but were scabby and disintegrated far to easily when boiled (See post Potato Harvest 2013). So in all likelihood I wont be growing them again any time soon. For 2014 I thought I would try three new varieties after all half the fun is trying something new. I have two earlies, a first and a second and one main crop variety.

The first early is called Winston, its has white skin and flesh and looks like a naked potato when cleaned up!
Winston First Early
My second early is Salad Blue, which I have seen advertised as a Main Crop but when I bought these advertised as a second early, so maybe I have an option with these to leave them in longer if I like. The are as the name suggests blue skinned but also blue fleshed which stays when cooked.

Salad Blue, Second Early/Main Crop
Finally the Main crop spud is Mayan Gold, a good roaster with a nutty yet creamy flavour, I am most excited by this one!

Mayan Gold Main Crop
I am happy with my choices, yet there is always going to be those other ones you wanted!! For me I had my heart set on Purple Majesty as my Main Crop but it had sold out already! And I saw another one called Yukon Gold but was but could not seem to find any in the UK.